Who doesn’t love the irresistible combination of Oreo cookies and creamy ice cream? Imagine turning that dreamy duo into a show-stopping dessert that’s as easy to make as it is delicious. This Oreo Ice Cream Cake is the ultimate no-bake treat, perfect for busy days, last-minute parties, or whenever you’re craving a decadent dessert without the fuss.
With its chocolatey Oreo crust, velvety ice cream layers, and fluffy whipped cream topping, this cake is a crowd-pleaser that’s sure to impress. Whether you’re hosting a summer gathering, celebrating a birthday, or simply treating yourself, this frozen delight is versatile enough for any occasion. Plus, it’s a make-ahead dessert, so you can prepare it in advance and focus on enjoying the moment.
Ready to create a dessert that’s as fun to make as it is to eat? Let’s dive into this simple yet stunning recipe and discover why this Oreo Ice Cream Cake will become your new go-to treat!
Table of Contents
Key Benefits for Oreo Ice Cream Cake.
Why You’ll Love This Oreo Ice Cream Cake?
If you’re looking for a dessert that’s both impressive and effortless, this Oreo Ice Cream Cake is your answer. Here’s why it’s a must-try:
- No-Bake Simplicity: Skip the oven! This no-bake dessert comes together with just a few simple steps, making it perfect for beginners or anyone short on time.
- Crowd-Pleasing Flavor: Combining the chocolatey crunch of Oreo cookies with the creamy richness of ice cream, this cake is a guaranteed hit at parties, family gatherings, or even casual weeknight treats.
- Make-Ahead Magic: Need a dessert that waits for you? This cake can be prepared in advance and stored in the freezer, so you’re always ready to impress unexpected guests or satisfy a sweet craving.
- Endless Customization: Love experimenting? Swap out flavors—try mint Oreos, strawberry ice cream, or even a drizzle of caramel sauce to make it your own.
- Family-Friendly Fun: From kids to adults, everyone adores this frozen treat. It’s a fantastic way to get the whole family involved in the kitchen!
Whether you’re a seasoned baker or a dessert newbie, this Oreo Ice Cream Cake is designed to make your life easier while delivering a decadent dessert that feels like a celebration in every bite. Ready to get started? Let’s gather your ingredients and dive into the fun!
2: Ingredients for Oreo Ice Cream Cake.
What You’ll Need for Your Oreo Ice Cream Cake
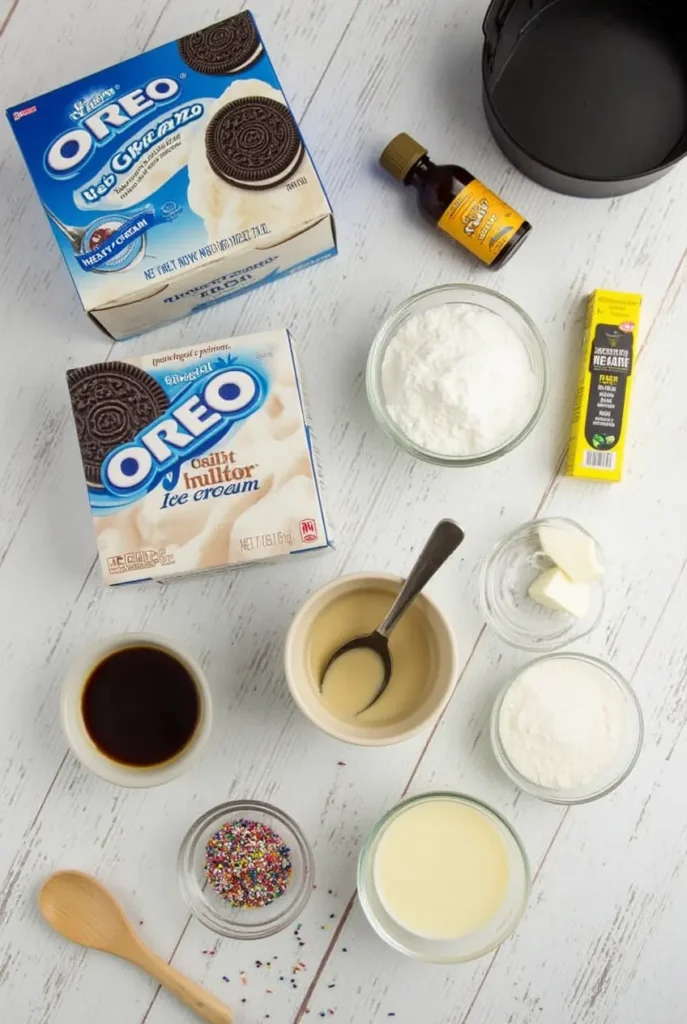
Gathering your ingredients is the first step to creating this decadent dessert. Here’s everything you’ll need to make your Oreo Ice Cream Cake a success:

For the Oreo Crust
- 24 Oreo cookies: These form the base of your cake, providing that iconic chocolatey crunch.
- 4 tablespoons unsalted butter, melted: This binds the crust together, giving it a perfect, firm texture.
For the Ice Cream Layer
- 1.5 quarts vanilla ice cream: The star of the show! Use softened ice cream for easy spreading.
- 1 cup crushed Oreo cookies: Adds extra texture and flavor to the creamy ice cream layer.
For the Whipped Cream Topping
- 1 cup heavy cream: Whipped to perfection for a light, fluffy finish.
- 2 tablespoons powdered sugar: Sweetens the whipped cream just right.
- 1 teaspoon vanilla extract: Enhances the flavor with a hint of warmth.
Optional Garnishes
- Extra Oreo cookies: For decorating the top.
- Chocolate sauce or syrup: Drizzle for a touch of indulgence.
- Sprinkles or chocolate shavings: Add a vibrant touch with sprinkles or chocolate shavings for extra color and a delightful crunch.
Equipment
- 9-inch springform pan: Makes it easy to remove the cake once it’s set.
- Food processor or ziplock bag: For crushing the Oreos.
- Electric mixer or whisk: To whip the cream to stiff peaks.
Pro Tips for Ingredient Success
- Softened Ice Cream: Let the ice cream sit at room temperature for 10-15 minutes before spreading. It’ll make the process much smoother!
- Crush Oreos Evenly: Use a food processor for fine crumbs or a ziplock bag and rolling pin for a chunkier texture—your choice!
- Quality Ingredients: Since this recipe is simple, using high-quality ice cream and fresh cream makes a noticeable difference.
With these ingredients and tips, you’re all set to create a show-stopping Oreo Ice Cream Cake that’s as fun to make as it is to eat. Ready to move on to the steps? Let’s go!
3: How to Make Oreo Ice Cream Cake.
Step-by-Step Guide to Making Your Oreo Ice Cream Cake.
Ready to create your decadent dessert? Follow these simple steps to build your Oreo Ice Cream Cake like a pro. Don’t worry—it’s easier than it looks, and I’ll guide you through every step!

Step 1: Prepare the Oreo Crust
- Crush the Oreos: Place 24 Oreo cookies (filling included) in a food processor or ziplock bag. Pulse or crush until you have fine crumbs.
- Mix with Butter: In a bowl, combine the crushed Oreos with 4 tablespoons of melted butter. Stir until the mixture resembles wet sand.
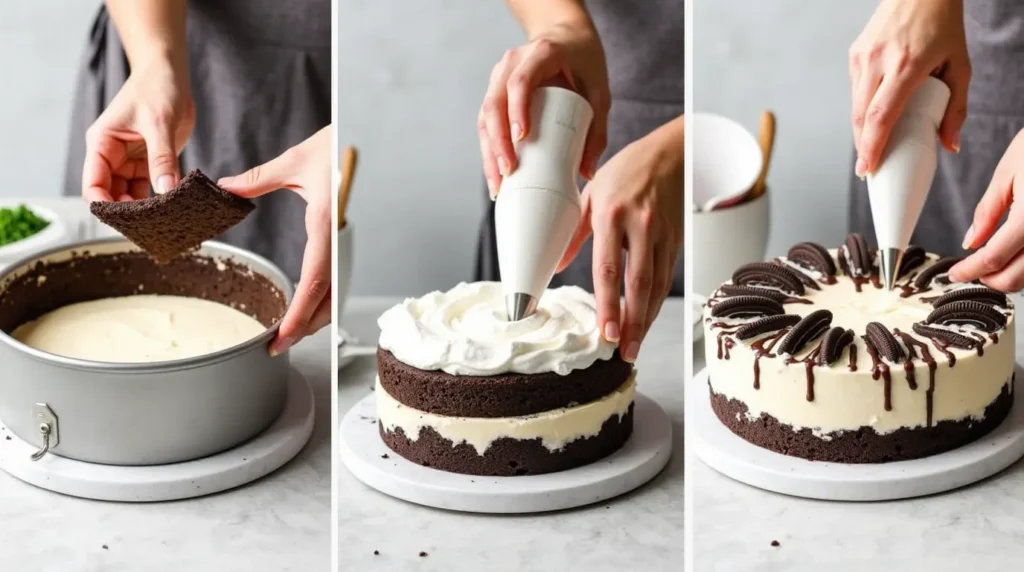
- Press into Pan: Transfer the mixture to a 9-inch springform pan. Use the back of a spoon or a measuring cup to press it firmly into an even layer at the bottom. Pop it in the freezer for 10 minutes to set.
Step 2: Add the Ice Cream Layer
- Soften the Ice Cream: Let 1.5 quarts of vanilla ice cream sit at room temperature for 10-15 minutes until it’s soft but not melted.
- Fold in Crushed Oreos: Gently mix 1 cup of crushed Oreo cookies into the softened ice cream for extra texture and flavor.
- Spread Over Crust: Scoop the ice cream mixture onto the chilled Oreo crust. Use a spatula to spread it evenly, creating a smooth top.
Step 3: Freeze Until Firm
- Cover the pan with plastic wrap or aluminum foil, then freeze for at least 4 hours (or overnight) until the cake is completely set.
Step 4: Whip the Cream Topping
- Whip the Cream: In a large bowl, combine 1 cup of heavy cream, 2 tablespoons of powdered sugar, and 1 teaspoon of vanilla extract. Use an electric mixer or whisk to beat until stiff peaks form.
- Spread Over Cake: Once the cake is fully frozen, remove it from the freezer. Spread the whipped cream evenly over the top.
Step 5: Garnish and Serve
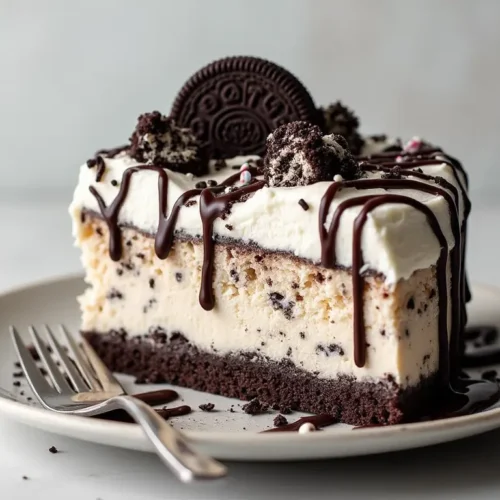
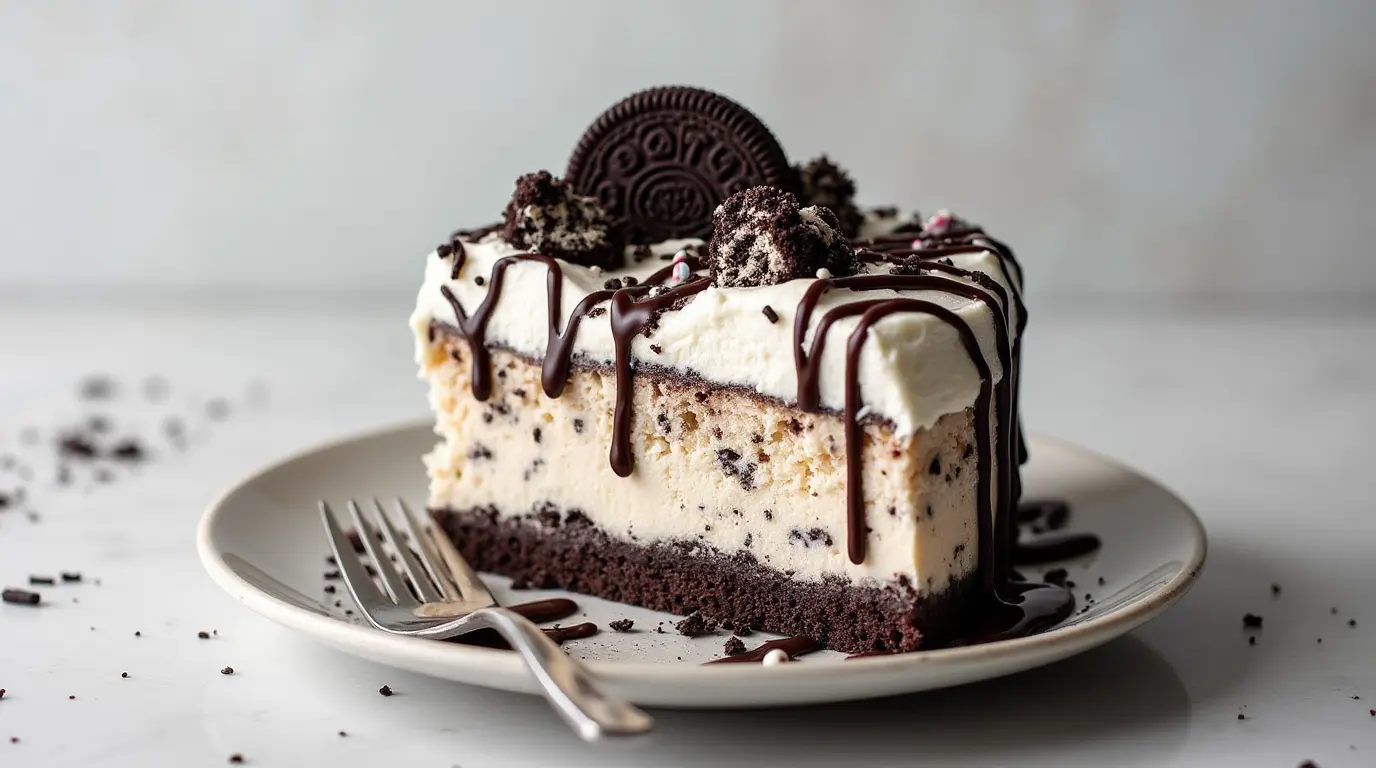
- Add the Finishing Touches: Crush a few extra Oreos and sprinkle them over the whipped cream. Drizzle with chocolate sauce or add sprinkles for a festive touch.
- Slice and Enjoy: Carefully remove the cake from the springform pan, slice into portions, and serve immediately.
4: Pro Tips and Variations.
Pro Tips and Creative Variations for Your Oreo Ice Cream Cake
Now that you’ve mastered the basics, let’s take your Oreo Ice Cream Cake to the next level with some pro tips and fun variations. Whether you’re looking to customize the flavors or perfect your technique, these ideas will help you create a dessert that’s uniquely yours.
Pro Tips for Success
- Freeze Your Tools: For easier slicing, freeze your knife for 10-15 minutes before cutting the cake.
- Layer Like a Pro: If you want distinct layers, freeze the ice cream layer for 30 minutes before adding the whipped cream topping.
- Prevent Sticking: Line your springform pan with parchment paper for easy removal and clean edges.
- Serve at the Right Time: Let the cake sit at room temperature for 5-10 minutes before serving to soften slightly for the perfect texture.
Flavor Variations to Try
- Mint Chocolate Twist: Use mint chocolate chip ice cream and mint Oreos for a refreshing, cool flavor.
- Cookies and Cream Delight: Swap vanilla ice cream for cookies and cream ice cream to double down on the Oreo goodness.
- Chocolate Lover’s Dream: Use chocolate ice cream and drizzle the top with melted chocolate or fudge sauce.
- Berry Blast: Add a layer of strawberry ice cream and top with fresh berries for a fruity twist.
- Salted Caramel Crunch: Drizzle caramel sauce between layers and sprinkle with a pinch of sea salt for a sweet-and-salty combo.
Dietary Adaptations
- Gluten-Free: Use gluten-free Oreo-style cookies to make this cake gluten-free friendly.
- Vegan: Opt for dairy-free ice cream and vegan whipped cream, and use plant-based butter for the crust.
- Lower Sugar: Choose sugar-free ice cream and reduce the amount of powdered sugar in the whipped cream topping.
Presentation Ideas
- Mini Cakes: Use muffin tins or small ramekins to create individual servings for parties or portion control.
- Decorative Toppings: Add crushed Oreos, chocolate shavings, sprinkles, or even edible flowers for a stunning finish.
- Layered Look: Alternate layers of different ice cream flavors for a visually striking dessert.
Why Experimentation is Key
The beauty of this Oreo Ice Cream Cake lies in its versatility. Don’t be afraid to get creative and make it your own! Whether you stick to the classic recipe or try one of these variations, you’re guaranteed a decadent dessert that’s as unique as you are.
Ready to serve up your masterpiece? Let’s move on to some serving suggestions to make your cake the star of the show!
5: Serving Suggestions.
How to Serve Your Oreo Ice Cream Cake Like a Pro?
You’ve created a show-stopping Oreo Ice Cream Cake, and now it’s time to serve it in style! Here are some practical tips and creative ideas to make your dessert the star of any occasion.
Perfect Slicing Tips
- Use a Hot Knife: Dip a sharp knife in hot water, wipe it dry, and slice through the cake for clean, smooth cuts. Repeat this step between slices for the best results.
- Portion Control: For smaller gatherings, cut the cake into 12 slices. For larger crowds, you can stretch it to 16 smaller servings.
- Chill Your Plates: Serve the cake on chilled plates to keep it from melting too quickly, especially on warm days.
Garnishing Ideas
- Classic Touch: Sprinkle crushed Oreos or chocolate shavings on top for a simple yet elegant look.
- Fruity Flair: Add fresh berries like strawberries or raspberries for a pop of color and a hint of freshness.
- Decadent Drizzle: Drizzle chocolate or caramel sauce over each slice just before serving for an extra indulgent touch.
- Fun and Festive: Top with colorful sprinkles, edible glitter, or even mini Oreos for a playful vibe.
Pairing Suggestions
- Coffee or Espresso: The rich flavors of coffee complement the chocolatey sweetness of the cake perfectly.
- Milkshakes: Serve with a side of Oreo or vanilla milkshakes for a dessert duo that’s pure bliss.
- Fresh Fruit: A side of sliced bananas, strawberries, or oranges adds a refreshing contrast to the rich cake.
Presentation Tips
- Elevate the Look: Place each slice on a decorative dessert plate and add a mint leaf or edible flower for a restaurant-worthy presentation.
- Serve on a Platter: For parties, arrange the slices on a large platter and garnish the edges with extra Oreos and chocolate drizzle.
- Individual Portions: For a fun twist, scoop the cake into bowls or cups and layer with extra whipped cream and toppings.
Why Presentation Matters
A beautifully served dessert not only tastes better but also creates a memorable experience for your guests. With these serving suggestions, your Oreo Ice Cream Cake will look as incredible as it tastes, making every bite a celebration.
Ready to wrap things up? Let’s move on to the conclusion and answer some common questions to ensure your dessert journey is a success!
6: Conclusion.
Why This Oreo Ice Cream Cake Will Become Your Go-To Dessert
Congratulations, you’ve just created a decadent, crowd-pleasing Oreo Ice Cream Cake that’s as easy to make as it is delicious! Whether you’re serving it at a party, celebrating a special occasion, or simply treating yourself, this no-bake dessert is guaranteed to impress.
Here’s why this recipe is a winner:
- Effortless Preparation: With no baking required and just a handful of ingredients, this cake is perfect for busy days or last-minute cravings.
- Endless Customization: From swapping ice cream flavors to adding creative toppings, you can make this dessert uniquely yours.
- Make-Ahead Convenience: Prepare it in advance and store it in the freezer, so you’re always ready to serve a show-stopping treat.
But beyond its practicality, this Oreo Ice Cream Cake is all about joy. It’s the kind of dessert that brings people together, sparks smiles, and creates lasting memories. So, whether you’re sharing it with loved ones or enjoying a slice all to yourself, savor every bite of this chocolatey, creamy masterpiece.
Your Next Steps.
Now that you’ve mastered this recipe, why not experiment with new flavors or presentation ideas? The possibilities are endless, and I’d love to hear how you make it your own. Share your creations with friends, family, or even on social media it’s a dessert worth celebrating!
If you have any questions or need more tips, check out the FAQs below. Otherwise, grab your ingredients, and let’s make your next Oreo Ice Cream Cake even more amazing. Happy baking or rather, happy freezing!
________________________________________________________________________________________

oreo ice cream cake
Equipment
- 9-inch springform pan : Makes it easy to remove the cake once it’s set.
- Food processor or ziplock bag : For crushing the Oreos.
- Electric mixer or whisk : To whip the cream to stiff peaks.
Ingredients
What You’ll Need for Your Oreo Ice Cream Cake
- Gathering your ingredients is the first step to creating this decadent dessert. Here’s everything you’ll need to make your Oreo Ice Cream Cake a success:
For the Oreo Crust
- 24 Oreo cookies: These form the base of your cake providing that iconic chocolatey crunch.
- 4 tablespoons unsalted butter melted: This binds the crust together, giving it a perfect, firm texture.
For the Ice Cream Layer
- 1.5 quarts vanilla ice cream: The star of the show! Use softened ice cream for easy spreading.
- 1 cup crushed Oreo cookies: Adds extra texture and flavor to the creamy ice cream layer.
For the Whipped Cream Topping
- 1 cup heavy cream: Whipped to perfection for a light fluffy finish.
- 2 tablespoons powdered sugar: Sweetens the whipped cream just right.
- 1 teaspoon vanilla extract: Enhances the flavor with a hint of warmth.
Optional Garnishes
- Extra Oreo cookies: For decorating the top.
- Chocolate sauce or syrup: Drizzle for a touch of indulgence.
- Sprinkles or chocolate shavings: Add a vibrant touch with sprinkles or chocolate shavings for extra color and a delightful crunch.
Pro Tips for Ingredient Success
- Softened Ice Cream: Let the ice cream sit at room temperature for 10-15 minutes before spreading. It’ll make the process much smoother!
- Crush Oreos Evenly: Use a food processor for fine crumbs or a ziplock bag and rolling pin for a chunkier texture—your choice!
- Quality Ingredients: Since this recipe is simple using high-quality ice cream and fresh cream makes a noticeable difference.
- With these ingredients and tips you’re all set to create a show-stopping Oreo Ice Cream Cake that’s as fun to make as it is to eat. Ready to move on to the steps? Let’s go!
Notes
| Nutrient | Amount |
| Calories | 350 kcal |
| Total Fat | 20g |
| Saturated Fat | 11g |
| Cholesterol | 55mg |
| Sodium | 180mg |
| Total Carbohydrates | 38g |
| Dietary Fiber | 1g |
| Sugars | 28g |
| Protein | 5g |
- Course: Dessert
- Cuisine: American
- Diet: Vegetarian (can be adapted to gluten-free or vegan)
- Method: No-Bake, Freezer
- Keyword: Oreo Ice Cream Cake, No-Bake Dessert, Frozen Treat
- Skill Level: Beginner
- Prepare the Crust: Crush Oreos, mix with melted butter, and press into a springform pan. Freeze for 10 minutes.
- Add the Ice Cream Layer: Soften vanilla ice cream, fold in crushed Oreos, and spread over the crust. Freeze for 4 hours.
- Top with Whipped Cream: Whip heavy cream, sugar, and vanilla, then spread over the frozen cake.
- Garnish and Serve: Add extra Oreos, chocolate drizzle, or sprinkles. Slice and enjoy!
7: FAQs.
Frequently Asked Questions About Oreo Ice Cream Cake.
Got questions? I’ve got answers! Here are some common queries about making and serving your Oreo Ice Cream Cake, along with practical tips to ensure your dessert turns out perfectly every time.
1. Can I use a different type of ice cream?
Absolutely! While vanilla ice cream is classic, feel free to experiment with flavors like chocolate, mint chip, cookies and cream, or even strawberry. Just make sure the ice cream is softened before spreading for the best results.
2. How long does the cake need to freeze?
For the cake to set properly, freeze it for at least 4 hours. If you’re preparing it ahead of time, overnight freezing works great too.
3. Can I make this cake gluten-free?
Yes! Use gluten-free Oreo-style cookies for the crust and ensure your ice cream and other ingredients are gluten-free. It’s an easy swap that doesn’t compromise on flavor.
4. How do I store leftovers?
Cover the cake tightly with plastic wrap or aluminum foil, or transfer slices to an airtight container. Let slices sit at room temperature for 5-10 minutes before serving.
5. Can I make this cake vegan?
Definitely! Use dairy-free ice cream, vegan whipped cream, and plant-based butter for the crust. Check that your Oreos or similar cookies are vegan-friendly too.
6. Why is my cake too hard to slice?
If the cake is overly firm, let it sit at room temperature for 5-10 minutes before slicing. Using a hot knife (dipped in warm water and wiped dry) also helps create clean cuts.
7. Can I add other mix-ins to the ice cream layer?
Of course! Get creative with mix-ins like chocolate chips, caramel swirls, chopped nuts, or even crushed candy bars. Just fold them into the softened ice cream before spreading.
8. How far in advance can I make this cake?
This cake is perfect for making ahead! You can prepare it up to 2-3 days in advance and store it in the freezer until you’re ready to serve.
9. Can I use a different pan if I don’t have a springform pan?
Yes, a regular cake pan or pie dish will work. Note that slicing and serving might be a bit trickier without the springform sides.
10. What’s the best way to transport this cake?
Keep the cake in the springform pan until you arrive at your destination. Place it in a cooler or insulated bag with ice packs to keep it frozen during transit.
Your Questions, Answered
I hope these FAQs have cleared up any doubts and given you the confidence to create your Oreo Ice Cream Cake with ease. If you have more questions or need additional tips, don’t hesitate to reach out. Now, go ahead and enjoy every bite of your decadent, homemade dessert!


1 thought on “Oreo Ice Cream Cake: Decadent Dessert Made Simple”